


![Crawl Swimming - Learn to swim crawl step by step [videos]](http://watery.ie/cdn/shop/articles/Design_uden_navn_48_6ee7d69e-0093-41d4-b66d-76c5e1ad6463.png?v=1781084923&width=1300)
The crawl basically consists of four things: A leg kick, breathing, a rotation, and an arm stroke. All four of these elements must be combined to achieve a natural position and propulsion in the water. I'll show you how to achieve this in 9 concrete steps below:
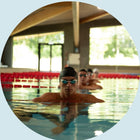
1. First, you need to have an idea of what the crawl looks like
Simply put, the crawl is one of four swimming styles - and actually the fastest one. As written above, the style is all about combining arms, legs, breathing and body rotation. You can see how to optimize this here:
Here, the legs kick backwards naturally and automatically, the arms are moved alternately through above and below the water while the body rotates as the arms change. Meanwhile, breathing is done to the side.
But at least now you know what it's all about - and how you should optimally swim the crawl
2. Start by learning to float
To achieve the natural position high up in the water for your legs, hips and head, the first thing you need to master is just being able to lie on the surface.
This is called “floating”.
A good way to practice this is to push off the edge with your feet and then float through the water with your arms and hands together and stretched out in front of your head. Do this while looking down towards the bottom.
If you can only stay there for 3 seconds without your legs starting to sink towards the bottom, then you have some work to do. On the other hand, if you can stay there for 10 seconds, you're in good shape.
3. Get started with the kicks
The first thing I would start with once you've mastered floating is definitely the leg kick. Because without a natural leg kick, your legs will be hurtling towards the bottom at light speed, and that's no way to move forwards.
Therefore, you should start by grabbing a swimming board (or an aqua worm to place under your armpits) and hold it out in front of you with your arms. Then start kicking your legs back and forth.
Naturally, your legs will move upwards.
4. The leg kick should come from the hip - and not be too big
When many people do the above, they do what is called “bicycle legs”. This is where you bend your knee when you kick.
This is the worst mistake you can make.
Instead, the knee should be stretched as naturally as possible, while the actual leg kick should instead come from the hip, which is moved back and forth.
This way, you'll achieve the most powerful leg kick while avoiding injuries and knee problems after a short time.
Another thing to keep in mind is that the leg kick shouldn't be one of those big elephant leg kicks. On the other hand, the leg kicks in the crawl should be small, quick kicks back and forth rather than big, slow and deep kicks.
One last thing is that the ankle should be completely relaxed, as a tense ankle creates backward resistance, which significantly reduces propulsion.
5. Put kicks and breathing together
To get started with breathing correctly in crawl swimming, to begin with, you will again take a swimming board and place it in front of you.
The difference is that instead of having two hands on top of the board, you place one arm down by your side. It doesn't matter which one it is - you choose the one that feels most natural to you.
Then you set off from the edge, put your legs in motion and turn your head up to the side where your arm hangs down from your body, take in air and exhale underwater.
The important detail here is that you turn your head forwards to lift your head.
Because when you lift your head forwards, you will naturally end up lying wrong in the water, with your upper body lifting while your legs end up on the bottom. This won't make you a strong swimmer.
These sideways breathing will also cause you to rotate your upper body, which is what you need to do.
6. Then the crawl arm grip
This is where it gets a little more difficult. Because now you have to keep the leg kick going, ensure lateral breathing and maintain rotation in the upper body - and now you have to put your arms on.
The way it works in the crawl is that your arms move around like two pin-wheels on either side of your body in turn.
You put your arms in front of you, bring your arm down under the water and press it down towards your often and then bring your hand back in front of your head above the water. This is done alternately for the arms.
In terms of breathing, when your arm is above the water on the breathing side, you take in air and when it is below, you exhale air under the water. This way, you always have a breathing arm and an exhaling arm.
A good way to get started with this is by using a swimming board that is placed in front of you. On this, you alternately hold on with one arm and the other arm.
7. Adjust the arm grip
Once you have the arm stroke and the entire crawl swim in place, there are definitely some adjustments to be made.
It's often a good idea to use a pair of flippers during this period, as they provide a natural propulsion so you have more energy to concentrate on your upper body.
When placing your arms in front of your body, they should be in a line from the centre axis of your body - i.e. off the centre of your forehead. If you put them across your body, you will wobble in your swim and if you put your arms in too wide, you will create a lot of resistance.
The arms should be placed as far forward as possible. This way, you achieve the longest/greatest pressure on the water.
When you then push underwater, make sure that your arm is not stiff, so that it becomes mill-arm swimming, but instead that your elbow is bent at 90 degrees, in order to achieve a larger surface to push on the water. This stroke should then be completed at the hip.
Once you have reached your hip with your arm under the water, slowly pull your hand out of the water by bending it. To bring your hand back in front of you, remember that you have a zip on the side of your body, from your hip to your armpit. Which you need to unzip with your thumb as you move your hand forwards.
Overall, it looks like this:
8. Find your natural rhythm
Once you start crawl swimming, try to find a natural rhythm that suits your level.
For most people, breathing every other crawl stroke, i.e. on the same side every time, works for most people.
On the other hand, some people prefer to breathe every 3rd stroke, so that the breathing alternates to the sides.


GET A DISCOUNT CODE WITH 10% OFF
The discount code can be used by all new customers on all products on the website, including the products recommended here in the article.
What are you waiting for? Get more out of your time in and on the water!
Best advice for your crawl swim
The three most important things to focus on during your crawl swim are your head position, arm stroke and ankle. For these three things, here's the best advice you should keep in mind when swimming.
1. Be relaxed in your ankles
When your crawl leg kick kicks off, many people forget to relax their ankles and instead tense up. Just don't do that.
Because with a relaxed ankle, your foot follows the movement of the water and you achieve a natural leg kick. With a tense ankle, on the other hand, you create backward water resistance so you don't go anywhere.
2. Keep your head naturally down towards the bottom
You're probably not the only one who looks straight ahead when swimming the crawl. However, this is a big mistake as it creates unnecessary resistance in the water.
On the other hand, you should be looking down - and slightly forwards.
To ensure the correct head position, the surface of the water should hit you at about the centre of your forehead or slightly above.
Then, when you need to breathe, turn your head to the side - don't lift it. If you lift your head instead, you will end up lying at an angle in the water, with your legs pointing down towards the bottom and your upper body above the water. We want to avoid this.
3. Put your arms naturally and lightly in the water
When you put your arms in the water, you should do so in a line from the centre axis of your body - i.e. from the centre of your forehead. If you put them over the centre, you risk shoulder injuries and if you put them wider, you create an unnatural pressure on the water.
To ensure this, you can make sure you bend your arm as you bring it forward and come out of the water. In addition, remember that you have a zip on the side of your body, from your hip to your armpit, which you need to unzip at each crawl stroke.
Optimize your crawl technique with equipment
Many people use equipment to optimize their technique, and there are several types of equipment that can optimally help you with this. Below, we have compiled a short list of recommended products:
Finger Paddles:
If you want to optimize your arm strokes, finger paddles are an essential “tool” to help you on your way. By using finger paddles, you will experience more strength and improved positioning as they promote high elbows.
We specifically recommend Speedo Finger paddles here.

Arena center snorkel - Swim Pro III - Black
4.61/5
Based on 18 reviews
Snorkel:
A snorkel is a perfect tool to optimize your crawl, with a snorkel you remove the breathing aspect and can fully concentrate on fine-tuning your technique.
We recommend the Arena Swim Snorkel here.
If you want a unique snorkel that promotes propulsion, the MP Focus Snorkel is recommended here.
[section=featured_product2] [section=featured_product3]
Flippers:
Flippers can be used for virtually any style, but are excellent for crawl, allowing you to keep your legs up while you learn the technique. Plus, it provides extra speed.


We recommend Arena Powerfin Pro here if you have narrow feet.
We recommend DMC here if you have wide feet.
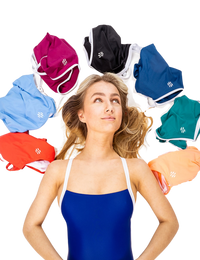
Nose clip:
An important factor to master when learning to crawl is your breathing, with a nose clip you avoid getting water in your nose when you put your head up for air, which is super effective.
We recommend the Watery Active nose clip here.


Earplugs:
Most swimmers don't like water in their ears, simply because it's not only uncomfortable, but it can also cause inflammation. No matter what style of swimming you do, a pair of earplugs is recommended.
We recommend the Watery Active earplugs here.


